Creating your site
After you've installed Material for MkDocs, you can bootstrap your project documentation using the mkdocs executable. Go to the directory where you want your project to be located and enter:
Alternatively, if you're running Material for MkDocs from within Docker, use:
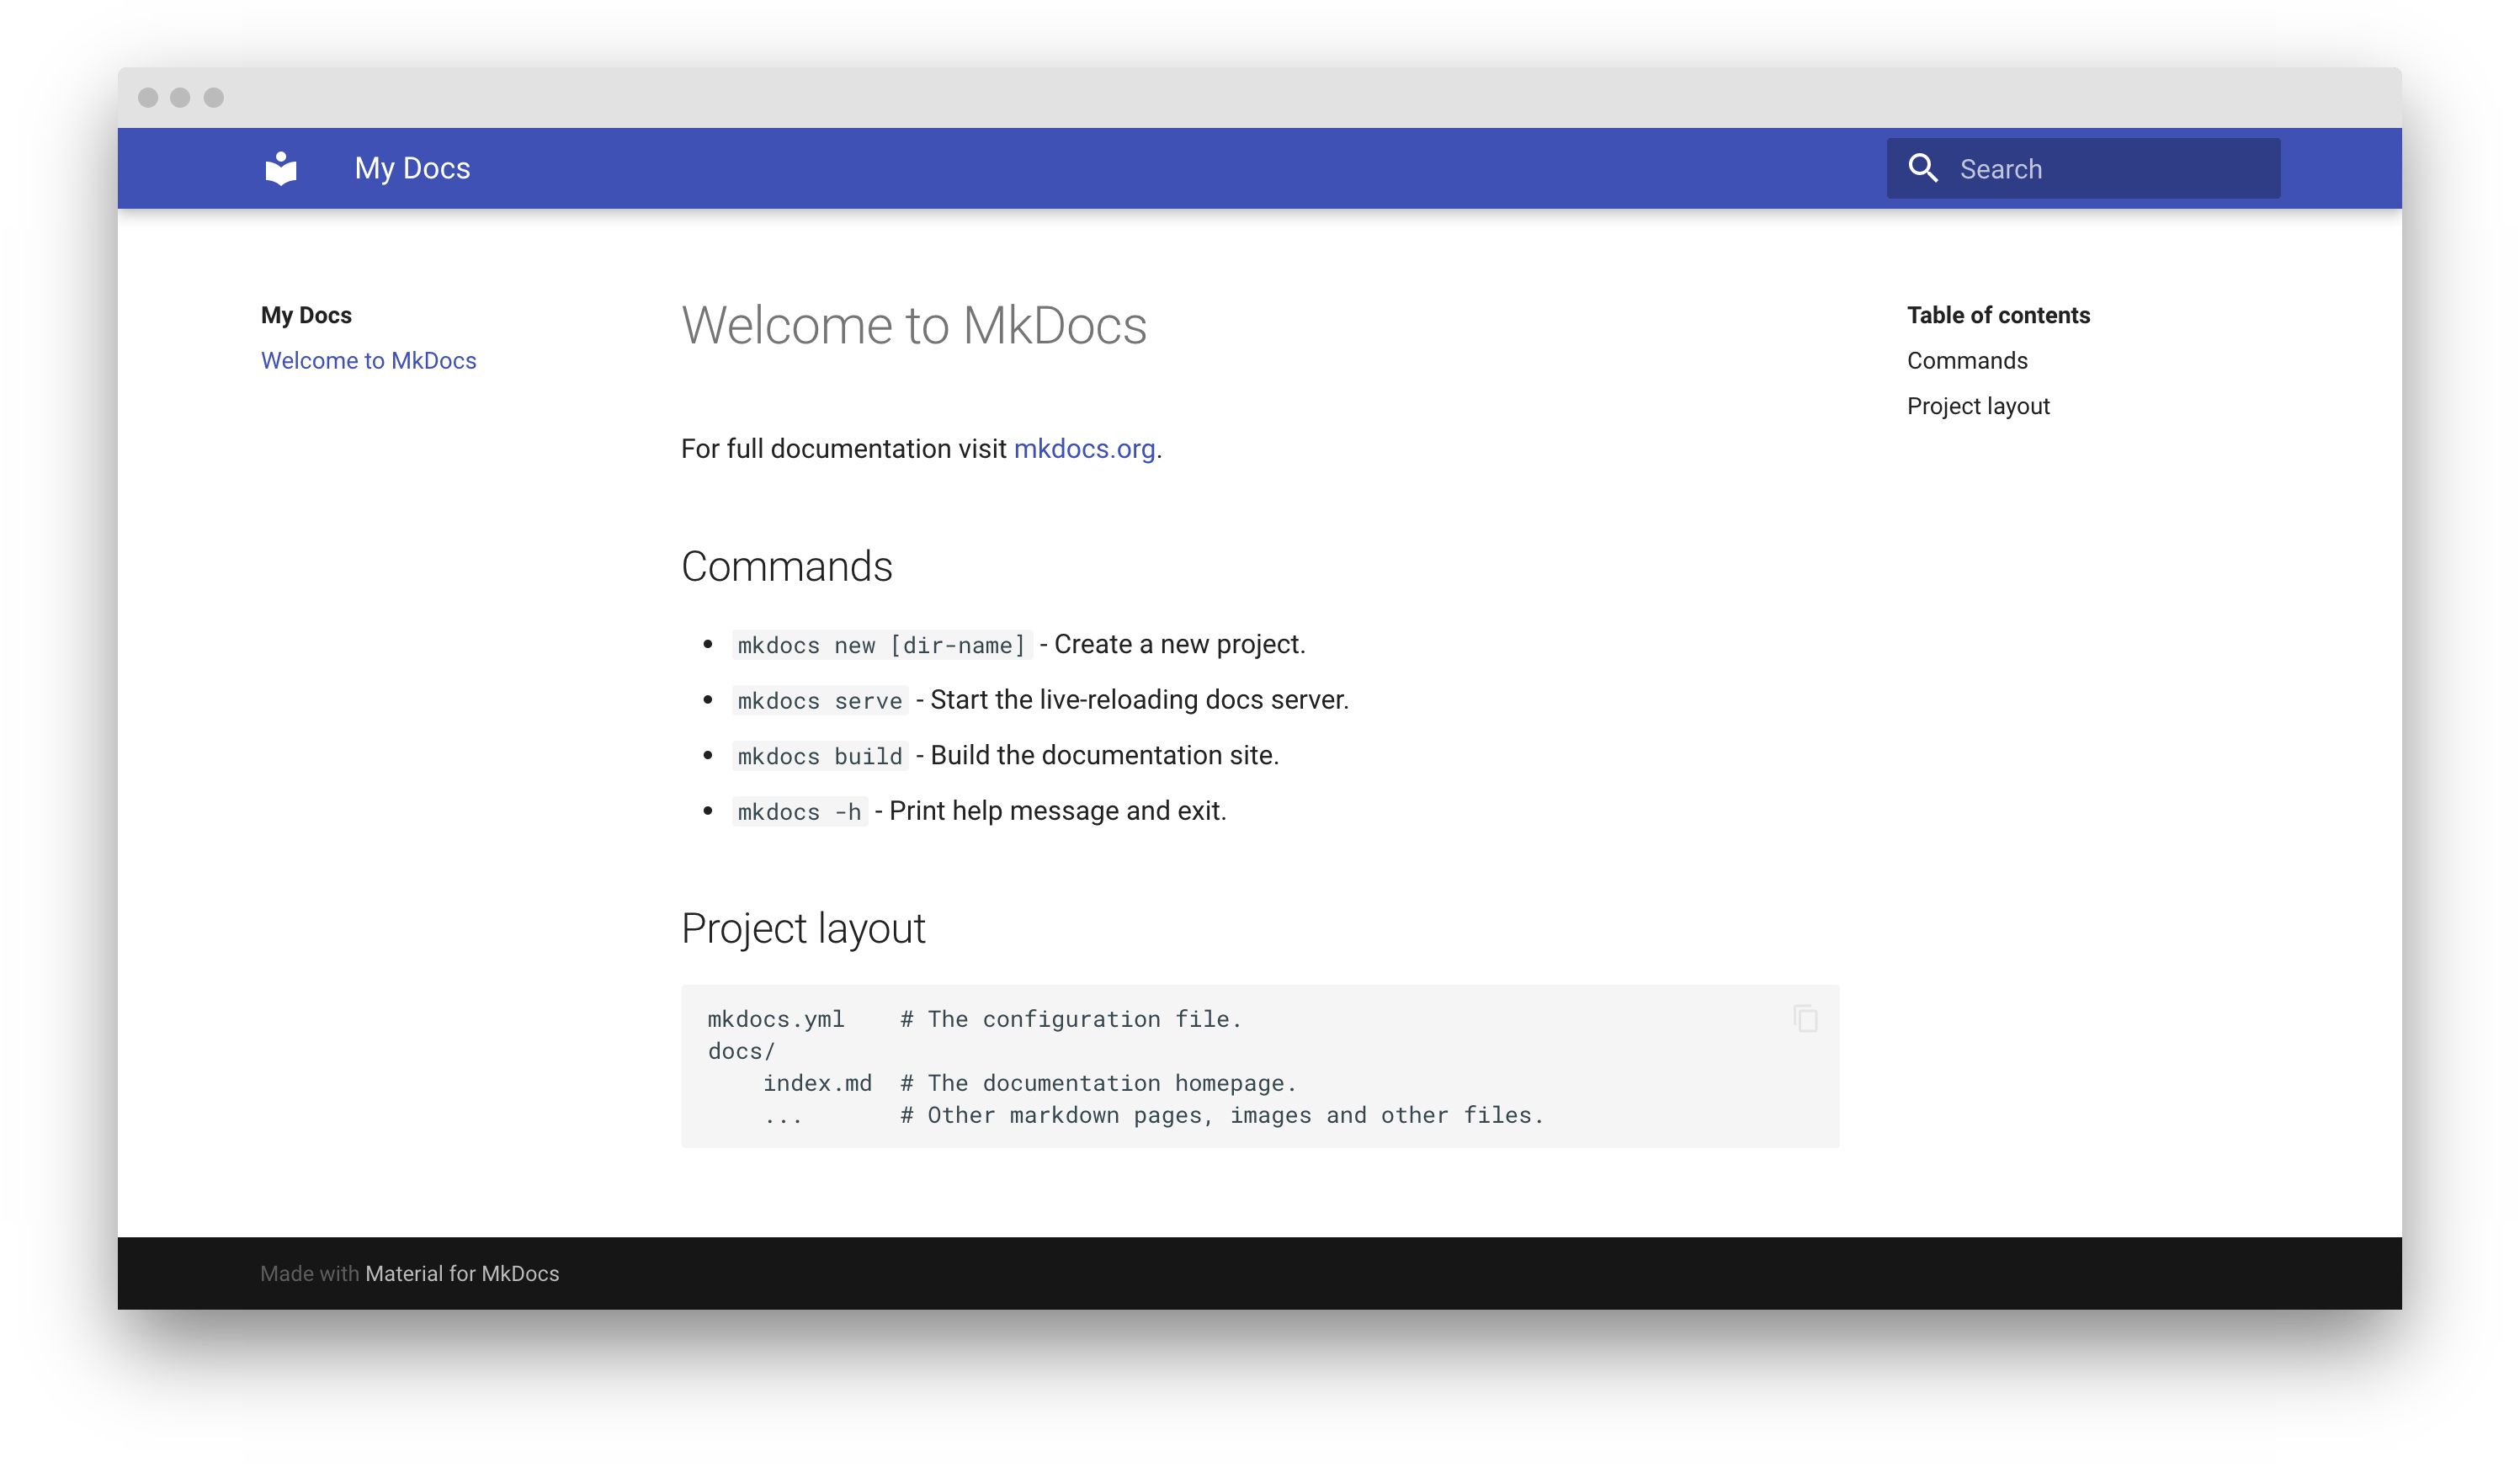
This will create the following structure:
Configuration
Minimal configuration
Simply set the site_name and add the following lines to mkdocs.yml to enable the theme:
The site_url setting is important for a number of reasons. By default, MkDocs will assume that your site is hosted at the root of your domain. This is not the case, for example, when publishing to GitHub pages - unless you use a custom domain. Another reason is that some of the plugins require the site_url to be set, so you should always do this.
Recommended: configuration validation and auto-complete
In order to minimize friction and maximize productivity, Material for MkDocs provides its own schema.json1 for mkdocs.yml. If your editor supports YAML schema validation, it's definitely recommended to set it up:
- Install
vscode-yamlfor YAML language support. -
Add the schema under the
yaml.schemaskey in your user or workspacesettings.json:{ "yaml.schemas": { "https://squidfunk.github.io/mkdocs-material/schema.json": "mkdocs.yml" }, "yaml.customTags": [ // (1)! "!ENV scalar", "!ENV sequence", "!relative scalar", "tag:yaml.org,2002:python/name:material.extensions.emoji.to_svg", "tag:yaml.org,2002:python/name:material.extensions.emoji.twemoji", "tag:yaml.org,2002:python/name:pymdownx.superfences.fence_code_format", "tag:yaml.org,2002:python/object/apply:pymdownx.slugs.slugify mapping" ] }- This setting is necessary if you plan to use icons and emojis, or Visual Studio Code will show errors on certain lines.
Advanced configuration
Material for MkDocs comes with many configuration options. The setup section explains in great detail how to configure and customize colors, fonts, icons and much more:
- Changing the colors
- Changing the fonts
- Changing the language
- Changing the logo and icons
- Ensuring data privacy
- Setting up navigation
- Setting up site search
- Setting up site analytics
- Setting up social cards
- Setting up a blog
- Setting up tags
- Setting up versioning
- Setting up the header
- Setting up the footer
- Adding a git repository
- Adding a comment system
- Building an optimized site
- Building for offline usage
Furthermore, see the list of supported Markdown extensions that are natively integrated with Material for MkDocs, delivering an unprecedented low-effort technical writing experience.
Templates
If you want to jump start a new project, you can use one of our growing collection of templates:
-
Create a blog
-
Create documentation with social cards
Previewing as you write
MkDocs includes a live preview server, so you can preview your changes as you write your documentation. The server will automatically rebuild the site upon saving. Start it with:
-
If you have a large documentation project, it might take minutes until MkDocs has rebuilt all pages for you to preview. If you're only interested in the current page, the
--dirtyreloadflag will make rebuilds much faster:
If you're running Material for MkDocs from within Docker, use:
Point your browser to localhost:8000 and you should see:
Building your site
When you're finished editing, you can build a static site from your Markdown files with:
If you're running Material for MkDocs from within Docker, use:
The contents of this directory make up your project documentation. There's no need for operating a database or server, as it is completely self-contained. The site can be hosted on GitHub Pages, GitLab Pages, a CDN of your choice or your private web space.
If you intend to distribute your documentation as a set of files to be read from a local filesystem rather than a web server (such as in a .zip file), please read the notes about building for offline usage.
-
If you're a MkDocs plugin or Markdown extension author and your project works with Material for MkDocs, you're very much invited to contribute a schema for your extension or plugin as part of a pull request on GitHub. If you already have a schema defined, or wish to self-host your schema to reduce duplication, you can add it via $ref. ↩